
Welcome!!, In this article, we are going to look at how to configure Kubernetes container orchestration.
Before reading this article, we should know the basic core concepts of Kubernetes components and
basic administration in Redhat OS or CentOS.
basic administration in Redhat OS or CentOS.
Pre-requisites: -
Hosts - 2 or 3 Machines (node) required.
RAM - 4 GB
Storage - 50 GB
CPU - 2 CPU
Let’s start How to install and configure Kubernetes in Redhat Enterprise Linux.
Here we are going to configure the Kubernetes cluster using 4 VM’s.
One VM – Master Node
Other three – Worker Nodes
Steps for Kubernetes Cluster Configuration
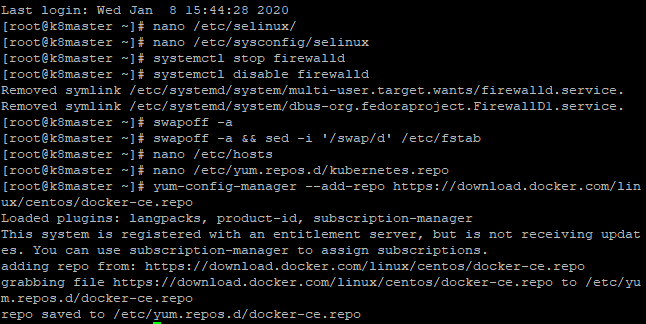
Step1: - Set Hostname with its IP address
Add the Host Name of all Hosts with those IP address (Consider all Hosts or VM as Nodes)
Run the below command to go Hosts file location to change hostname with its IP
nano /etc/hosts
“Hostname with its IP(We need separate IP for each host or node)”
We just gave the below names for nodes
Master node name – k8master
Worker nodes Name – knode1, knode2, knode3

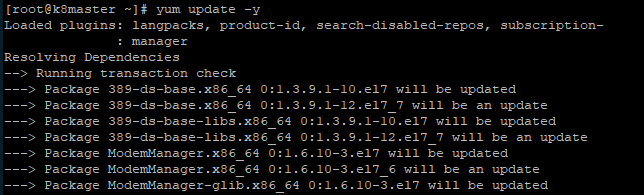
Step 2: - Update OS
Keep the OS Up to date
Run the below command to update OS
yum update -y
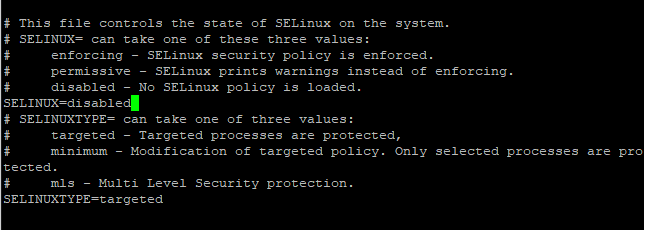
Step 3: - Disable SELinux
By Disabling the SELinux all containers can easily access the host filesystem.
We can Disable SELinux by two methods
1. Run below command
setenforce 0
sed -i 's/^SELINUX=enforcing$/SELINUX=permissive/' /etc/selinux/config

2. Go to SELinux configuration file and disable it
Run the below command
Run the below command
nano /etc/sysconfig/selinux and type SELINUX=disabled
Step 4: - Disable or Off the SWAP
By disabling the SWAP kubelet will work perfectly.
Run below Command to Disable SWAP
swapoff -a && sed -i '/swap/d' /etc/fstab
Step 5:- To Allow Ports in firewall or Disable firewall
By allowing the below ports or disabling firewall all containers, network drivers and pods are
communicating across the Kubernetes cluster properly
Run the following command to allow ports in firewall
firewall-cmd --permanent --add-port=6443/tcp
firewall-cmd --permanent --add-port=2379-2380/tcp
firewall-cmd --permanent --add-port=10250/tcp
firewall-cmd --permanent --add-port=10251/tcp
firewall-cmd --permanent --add-port=10252/tcp
firewall-cmd --permanent --add-port=10255/tcp
firewall-cmd –-reload
Run the below command to disable the firewall (This step is not recommended for a production
environment, but in this article, we are going to do disable firewall)
systemctl stop firewalld
systemctl disable firewalld

Step 6: - To update the IP Tables run the following command
By updating IP Tables, Port forwarding and Filtering process will work perfectly
Run the below command to update the IP tables
modprobe br_netfilter
echo '1' > /proc/sys/net/bridge/bridge-nf-call-iptables
Step 7: - To Install Docker and Kubernetes in nodes, need to configure docker and
Kubernetes repositories
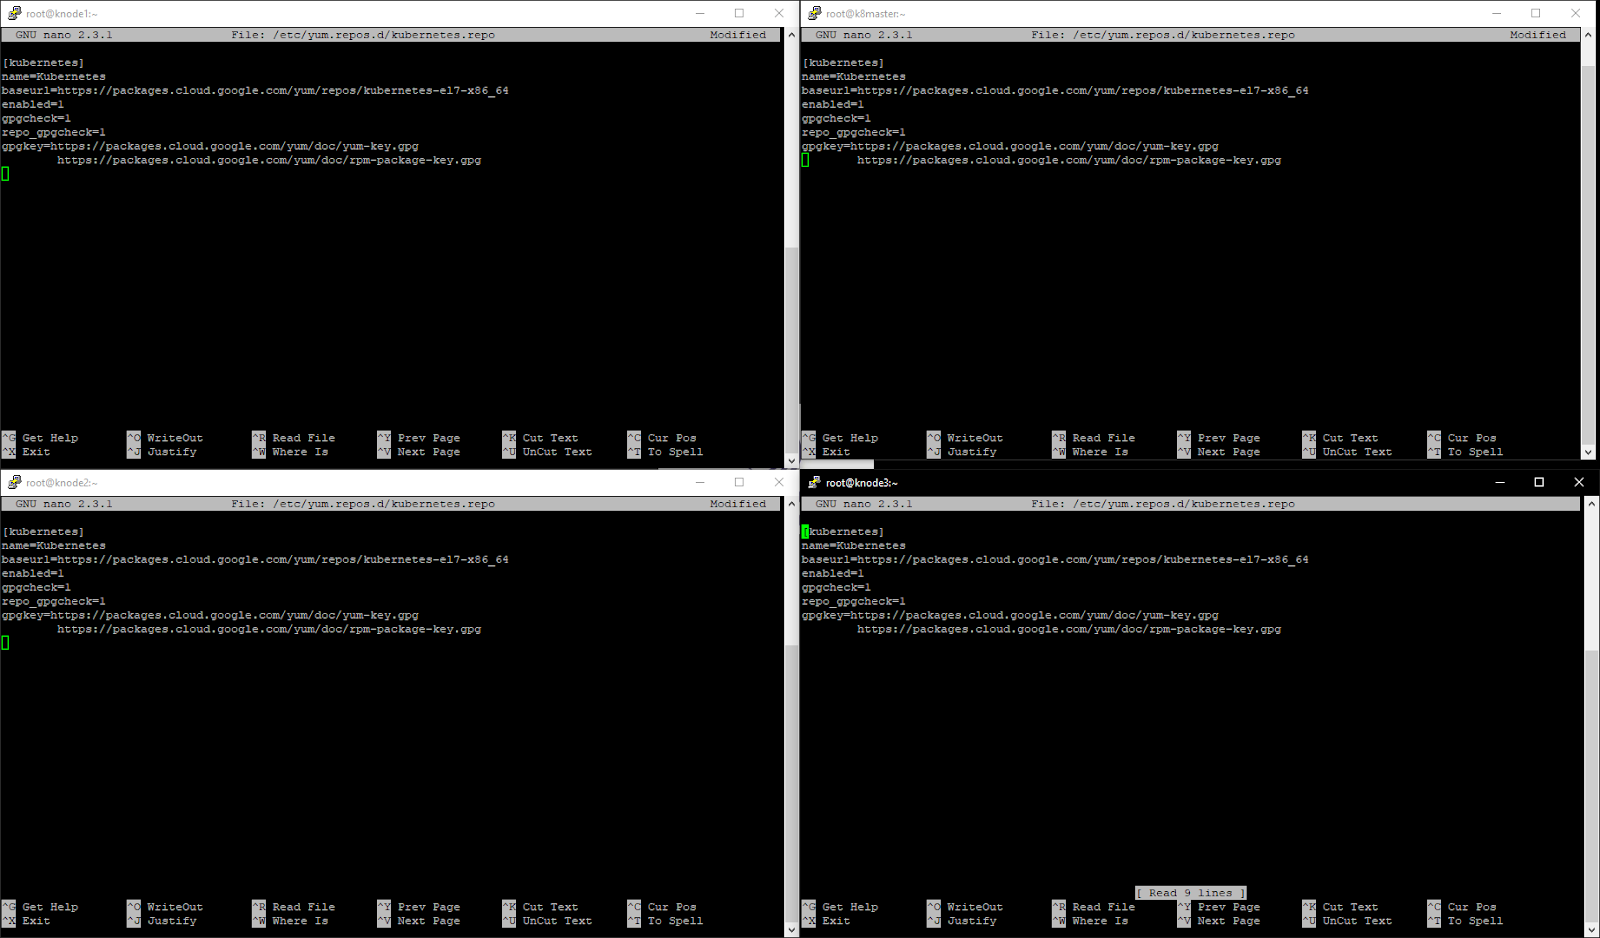
Kubernetes: - Run the below command to add Kubernetes repo
nano /etc/yum.repos.d/kubernetes.repo
Paste the below details in nano editor
[kubernetes]
name=Kubernetes
baseurl=https://packages.cloud.google.com/yum/repos/kubernetes-el7-x86_64
enabled=1
gpgcheck=1
repo_gpgcheck=1
gpgkey=https://packages.cloud.google.com/yum/doc/yum-key.gpg
You can see below screenshot I have added the above details in all four VM’s.
Docker:- Run the below command to add docker repo
yum-config-manager --add-repo https://download.docker.com/linux/centos/docker-ce.repo
To download external packages:- Run the below command to get all docker and Kubernetes
packages from docker and google repositories without any issues
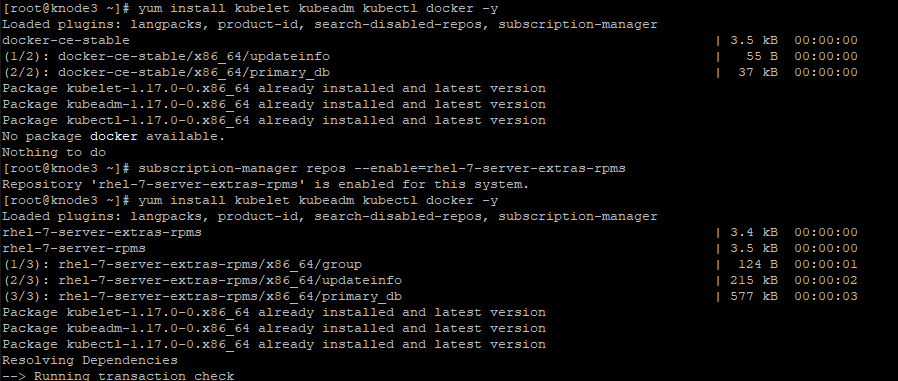
subscription-manager repos --enable=rhel-7-server-extras-rpms
Up to this, you can see all the steps in below snap.
Step 8:- To install the docker and Kubernetes components
Run the following command to install the Kubernetes / Docker (kublet kubeadm kubectl docker)
yum install kubelet kubeadm kubectl docker -y
Step 9: - To start and enable Kubernetes and docker services
Run the below commands to start
systemctl start docker && systemctl enable docker
systemctl start kubelet && systemctl enable kubelet
Step 10: -To run the cluster configuration in the Master node, this step should follow only in the master node
Run the below command to start cluster configuration in the master node
kubeadm init --apiserver-advertise-address=10.1.5.46 --ignore-preflight-errors all --pod-
network-cidr=10.244.0.0/16 --token-ttl 0
apiserver address must be your master node (10.1.5.46) address
You can see the below output

After the successful start of kubadm master, we need to run the above-shown command from
the non-root or root user then only a user can control the kubectl commands.
Run the command
mkdir -p $HOME/.kube
sudo cp -i /etc/kubernetes/admin.conf $HOME/.kube/config
Run the command
sudo chown $(id -u):$(id -g) $HOME/.kube/config
Step 11: - To check the all pods are running successful in cluster
Run the command you can see all pods in namespaces
kubectl get pods –all-namespaces

You can see the coredns service not yet started, still in pending, So that we need to install
flannel network plugin to run coredns to start pod network communication.
Step 12: - To Install Flannel Pod network driver
Run the below command to install POD network

Now you can see coredns and all pods in namespaces are ready and running successfully.

Step 13: - To Taint master node as a Master
Run the below command to taint the master node and make as a master.
kubectl taint nodes --all node-role.kubernetes.io/master-
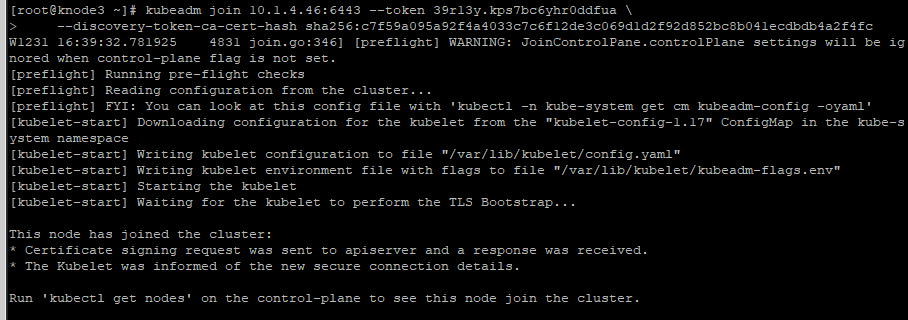
Step 14: - Join the Worker Nodes to the Master Node.
Run the token which produced by the master node in other nodes to join the cluster.
kubeadm join 10.1.5.46:6443 –token lixbn2.aea4n63ypd42578
Run the command to check all the nodes are connected to cluster or not
Kubectl get nodes
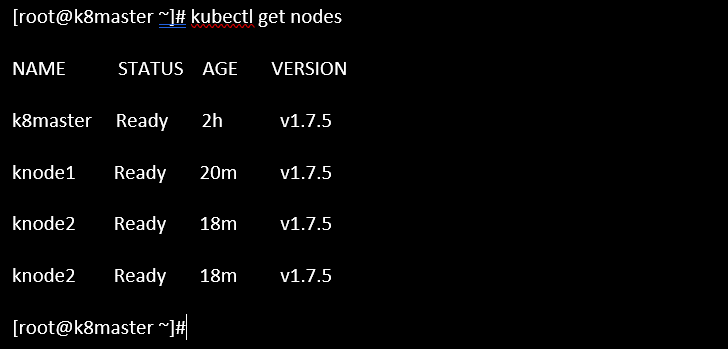
All the nodes are successfully added
Step 15: - To Install and configure Kubernetes Dashboard
Run the Below Command to install the dashboards
kubectl apply -f https://raw.githubusercontent.com/kubernetes/dashboard/v2.0.0-
beta8/aio/deploy/recommended.yaml
beta8/aio/deploy/recommended.yaml

Create a service account dashboard(username) for the dashboard to access it
kubectl create serviceaccount dashboard -n default
Run the below command to give admin access to the user(dashboard) to bind with the cluster for
accessing the dashboard.
accessing the dashboard.
kubectl create clusterrolebinding dashboard-admin -n default --clusterrole=cluster-admin --
serviceaccount=default:dashboard
Run the below command to generate the secret key for dashboard user to access Kubernetes
dashboard
dashboard
kubectl get secret $(kubectl get serviceaccount dashboard -o jsonpath="{.secrets[0].name}") -o
jsonpath="{.data.token}" | base64 --decode
You can see the generated key below, copy and save it.
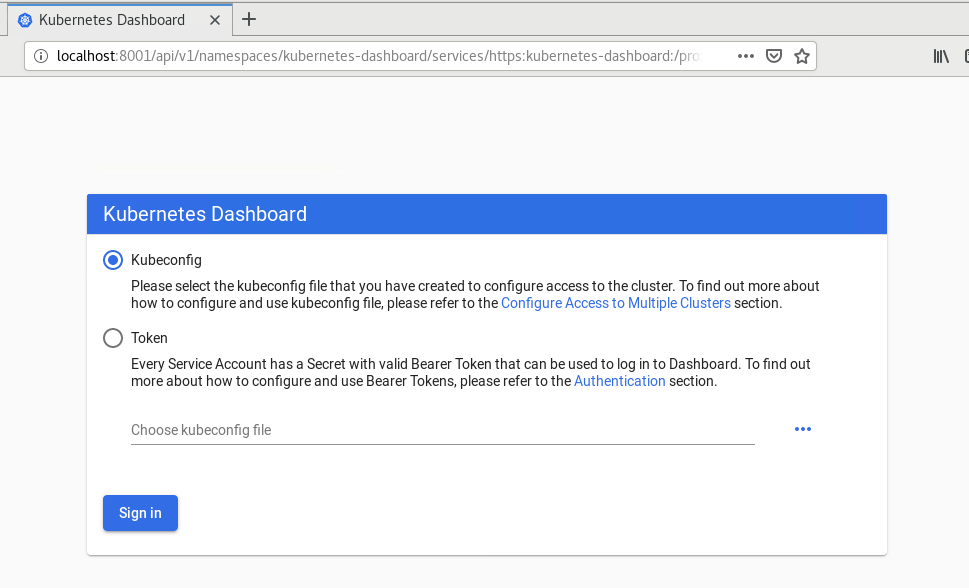
To start the dashboard service, Run the below command.
kubectl proxy
Paste and Go to the below URL in Master Node and click the token radio button and then paste the generated access token.
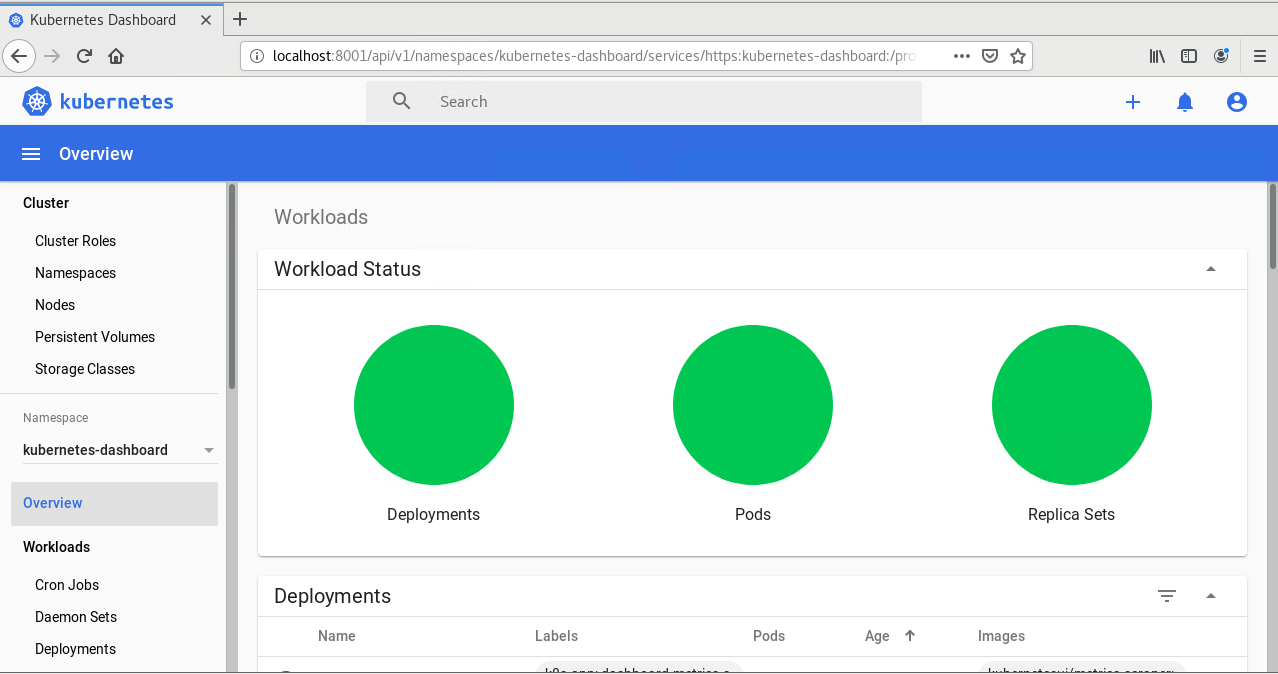
After signing in you can see the Kubernetes dashboard
Awesome, at the end we have completed our Kubernetes cluster configuration setup successfully
I hope you love this article, please share and like it
Cheers,
Gokulakrishna
Nice article.can you please share the full kubernetes course.
ReplyDeleteThanks
Mohiy
i am working on it once complete i will share
Delete
ReplyDeleteInnovative solution that really shines, QtScrcpy offers smooth mirroring and control capabilities for Android devices. Its cross-platform support and lightweight architecture make it efficient and powerful, giving users flexibility, convenience, and confidence while handling devices remotely every day.
Spectacular performance delivered by SPDLOG enhances developer productivity significantly. Logging is easy, fast, and customizable, allowing efficient tracking of application behavior. Its minimal overhead ensures smooth execution, making it an essential library for both large-scale systems and small projects alike.
ReplyDelete